In order to make the service more convenient, we developed an App that will allow you to set up a signing station kiosk and make the review process of the signed forms by the staff easier and faster.
To get started, follow 3 simple steps:
Guide to use Cyber Waiver App
Android App will allow you to choose from a wide variety of cost-effective equipment along with protection accessories from theft and accidental damage. The current market offers a large number of kiosk enclosure models including counter stands, wall mounts and self-charging stations.
Apple Users must use the Software directly from a browser.
To open the App on your device, look for a Cyber Waiver icon.
By default, the App opens in a Demo Mode.
This demo configuration mode was created as a presentation of a common Cyber Waiver Frontend interface.
The mode represents a typical use of an App and displays what your customers will see on a tablet, if you are planning to set up on-site signing station.
You can go ahead and try the demo app. If you provide your valid email address, you will receive a copy of the filled form. That form is identical to the ones you will receive from your customers.
STEP 2: Connect App to an Account you created earlier
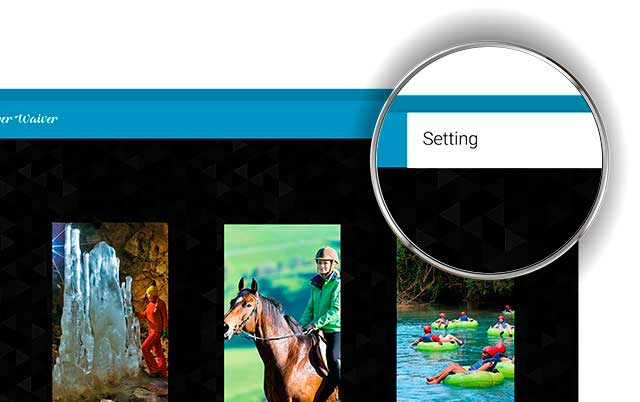
To connect the App to the web Server click on three vertical dots in the right top corner to activate a pop-up menu. Click on “Setting“.
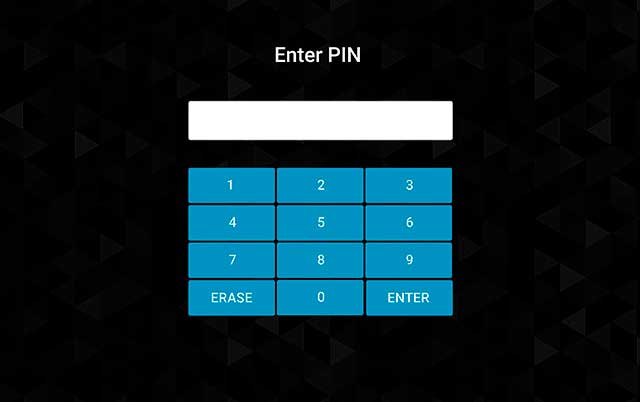
Set up a four digit pin code. You will need to enter this pin every time you want to access App Settings. The Pin is necessary to keep your Settings secure and to insure that the users do not accidentally change something.
Now it is time to switch from Demo Mode to Web Server connection.
Fill up your Login and Password information that match the data you put when created an Account on Cyber Waiver website.
The App is now connected to the Web Server. All data will be synchronized with your Account. To avoid delays on data transfers, make sure the Internet connection is constant and the signal has no interruptions. If a customer performs the procedure in a facility, the staff have access to real-time live tracking from their mobile devices. The information is available instantly with no time delay and can be refreshed by clicking on a “REFRESH” button.
If you have already set up your Admin Panel Settings and created Activities, the App should display your account information.
If you have not set up your Admin Panel Setting, you can learn how to create Activities here.